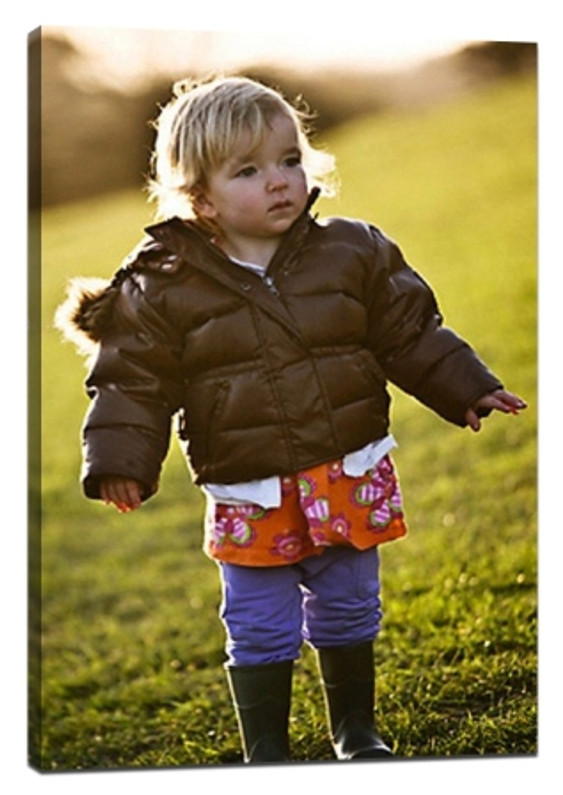
How to use backlight to capture details of photos
How to use backlight to capture details of photos
In many photography tutorials, there is a principle that the sun should be placed behind you to be photographed in a direct light so that the subject is exposed to the light. It's a well-known photo tip, and in general, photos that follow it tend to be successful. It can be tricky to watch a scene from a backlight perspective, and there are a few things to be careful about, but once you master backlighting, you have a powerful way of making a picture stand out from the rest of the picture.
Not all situations, not all subjects are good for backlighting, so it's important to be cautious - for any experimental creation. Learning to accurately understand the light conditions and correctly choose the subjects suitable for backlighting is the key to successful backlighting. Theoretically, any kind of light can serve as a backlight source, but the stronger the light, the better the backlight effect.
The Angle of the light is also very important. For example, the noontime sunlight can be used as a backlight source, but because the Angle of the light source is very high, the effect is closer to the top light, and the backlight is less intense. When the sun is near the horizon in the morning or at dusk, objects on the ground are almost completely backlit, so the effect is more pronounced and intense. Similarly, winter is better for backlighting than summer, since the sun's arc is very low in winter, and backlighting works better.
Subjects suitable for backlighting are abundant: portraits, birds, animals, plants, etc. Backlighting is a powerful way to show off the sophistication and texture of translucent objects. Objects that are backlit also form long shadows in the direction of the camera, providing additional points of interest for the image.
But even leaving aside the subject and the form of light, one thing alone can determine the success or failure of a backlight photograph -- exposure. With the right exposure, you can almost ride the backlight. It's important that you exclude the background and allow the subject to get the right exposure. For most subjects, there is nothing wrong with choosing a metering mode based on the overall picture -- like evaluating metering or matrix metering. However, it is almost doomed to fail if such a metering mode is still used in the backlight shooting, because the light from the background can seriously mislead the metering system, causing the subject of the shooting to overexpose and even turn into silhouette. To avoid this problem, you need to switch to a spot or area metering mode, which allows for more accurate metering just for the subject area. In such metering mode, the background light does not affect the camera's judgment, and the subject can get the correct exposure.

The right person
Plants and flowers, for example -- their leaves and petals are translucent; A furry animal, or a friend or model with long, attractive hair.
2. Careful composition
Consider the light and the background carefully. The low-angle sun is a good backlight. Try to take backlight photos in front of a clean, dark background to make the subject stand out and emphasize dramatic lighting effects.
Use spot metering
Choose the spot metering mode and directly measure the light of the subject. This method ensures that your subject is exposed correctly. If your SLR doesn't offer a point-metering mode, you can also zoom in or zoom out, letting the subject take over the entire field of view, shooting in manual mode, and then recomposition.
Thinking light
Shoot in front of a dark background to highlight where your subject is backlit, making them even more vivid. At the same time, it can reduce the area of bright areas behind the main body and eliminate the interference of these areas.
Test exposure
The effect of different exposure parameters on the image was investigated. Exposure to the highlights around the subject creates a dramatic effect, with only the contours of the subject visible. This can also be achieved by adjusting the "exposure" Settings when post-processing a RAW file.
Reduce contrast
When the sunlight is weak or low in the sky, the contrast of the picture is reduced, reducing the shadow of dead black and the highlight of dead white.
The hood
When backlighting, be sure to add a lens hood to avoid glare. Glare is often one of the biggest problems when shooting in the direct direction of the light source, so keep the lens with a hood at all times, and use your hands or cardboard to block the top of the lens if necessary. You can also experiment by hiding the sun just behind the subject to see what interesting effects you can get.
Ignore the overexposure background make the portrait work that gives a person to shine at the moment, whether in a studio or outdoors, backlighting portraits can always take on a unique style. When both the character and the backlight are in the right position, the latter will form a beautiful contour light around the character's head, making the hair appear soft and shiny, and letting the character jump out from the dark background.
Recent Posts
-
Affordable Large Canvas Prints: How to Find Cheap Canvas Prints Without Compromising on Quality
If you’ve ever thought about decorating your space with large canvas prints, you might have he …18th Feb 2025 -
Cheap Canvas Prints for Painting: Affordable Art Supplies for Every Artist
For artists, finding high-quality yet affordable materials is essential to fueling creativity withou …17th Feb 2025 -
Floating Frames for Canvas: Elevate Your Wall Art with Style
When it comes to displaying canvas art, the right frame can make all the difference. Floating frames …14th Feb 2025
