9 tips for shooting in low light
Photography is the art of capturing light and shadow. Whether it is in a well-lit day or in a low-light environment at night, it also tests our use of light and shadow. Low light shooting generally refers to the relatively dim, after the sun under the environment of shooting, difficulties encountered by significantly increased than when the light is enough, a test of power and patience, but we should be holding a "method is more than difficult" the idea of step by step to solve difficulties, try and practice more to become their own skills, under low light environment can with ease, open up a new realm of filming. So this article will share 9 key techniques for low-light landscape photography.
1. Completely control the camera with "manual mode"
In most cases we are used to aperture prerequisite and shutter prerequisite modes. It's hard to switch to manual mode for a while, but the manipulative and creative nature of manual mode will leave you with no regrets. In terms of application, after switching to manual mode, in order to adjust the appropriate exposure setting, pay attention to the effect your subject and preset want to make. This is the most important benchmark in exposure setting.
For example, if your picture is fixed, such as mountain scenery, night scenery, etc., we should use a tripod to stabilize the camera, coupled with a lower sensitivity (about ISO 100-400) and use a slower shutter speed for a long time exposure to compensate for the lack of light absorption.
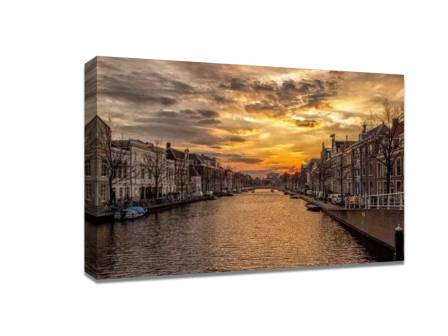
In aperture Settings, the best Settings are to keep the picture as sharp as possible and to have enough light. Unlike the aperture preset mode, in manual mode we have to constantly change our exposure Settings, especially during the "golden hours" (half an hour before dawn and dusk) when the sun is at its softest and golden. The photos taken during this time feel quite dreamy, but the ambient lighting also changes constantly. One moment you get a shot, the next moment you may have to adjust the exposure again.
When shooting, it is recommended to turn on the Live View and use the histogram for metering and contrast exposure.

2. Get ready for composition
Low-light shots often require trial and error, plus long exposures, to get more results. Therefore, the shooting process takes a long time, so you must do more preparation before shooting.
When shooting a sunset or night scene, you must arrive at the scene at least one to two hours before sunset to prepare the shooting equipment and find the suitable foreground. For starry skies, find the location that is least affected by light. With the composition in mind, the next step is to prepare the necessary shots to express what you are thinking.
Try a wide-angle lens
Maybe you need a telephoto lens to make the subject more prominent and to minimize the black areas. Or you may need a wide Angle lens to create the atmosphere you want to express. Think about the composition before shooting, try different Settings when shooting, one day you can find the direction in your mind.
3. The pursuit of stability
Carrying a heavy tripod to the mountains to shoot, may indeed be a little hard. However, since the light source is relatively weak after dusk, the exposure time is longer, generally depending on the shooting may need to use 1/20 second or even up to 30 seconds, 1 minute, 2 minutes ranging from slow shutter. And the photographer handheld shooting time too long, there will be hand shock, make the photo fuzzy. So in order to take good photos and maintain a high sharpness, it is better to wear a tripod.
Place the tripod at approximately the shooting position and place one foot directly in front of your subject so that you can stand between the two rear tripods. After placement, make sure the tripod platform is in a horizontal position. Finally, if the shooting position is windy, something should be put in place to fix the position of the tripod. Of course, we can still try our best to shoot when there is no tripod. For example, we can place the camera on the railing, stone and other fixed positions to hold the camera in a correct posture or lean against the wall and railing to make the body more stable for shooting. These methods reduce the movement of the exposure, so that the image remains clear and detailed.
If the scene is too dark at night, you may have to use a large aperture or a high ISO to shoot the scenery without a tripod.
4. Low-light focusing skills
If you have ever shot a night scene, you may have tried to shoot it but failed. The main reason is that the camera failed to focus so that it could lock the shooting function. So how do you shoot in low light?
The simplest way to do this is to use manual focus, which is more convenient with an electronic viewfinder (EVF) or a camera that displays the image in real time. Set the camera's screen to maximum brightness, compose the image, place the frame firmly, then place the main body in the focus rectangle, press the zoom button, and then rotate the focus ring until you get the sharpest picture.
Surround focus
It is generally accepted that the surround shot technique is only used for exposure, but it can also be used for focusing. Even with all the care you take, there will always be some human error. So by taking pictures with different focal lengths, we have a choice on the big screen of the computer to choose the best one. The method is straightforward, focusing first and then fine-tuning to focus closer and farther to take different pictures.
Sometimes in a low-light environment with manual focus may wish to try different to the focus of the shot, so as not to go home to find that the photo to the focal point is difficult to recover.
6.surrounded by exposure skills
As with surround focus, surround exposure is made up of taking multiple shots of the same frame at different shutter speeds (usually 3) to ensure the best results. It is best used when you are not sure which setting is the correct exposure. Of course, correct exposure is not clearly defined. Here we base our exposure on correct data.
Another technique used to surround exposure, which I'm sure you all know, is high dynamic range HDR. The method of shooting is to take a photo with an exposure indicator of 0, and then adjust the shutter speed to take an overexposed +1 and underexposed -1 respectively. Finally, use the HDR Pro in Adobe Photoshop to combine the three photos and make some tweaks.
Use a filter to balance the light
Sometimes, if the sky is much brighter than the ground at dusk or sunrise, the ground will be severely underexposed and turn black. Exposure to the ground as the sky will be seriously overexposed into a pale. At this time you need to use a gradient grey filter (GND) to balance the light difference, so as not to appear too much exposure or too dark. GND filter can be used to make the photo look like HDR photo.
8. Try to avoid any camera vibration
With enough advice, everyone should be able to take a good picture. But as a perfectionist photographer, you can't go wrong. What we need, then, is a remote control, either wired or infrared, to eliminate the tiny amount of vibration that comes with pressing the shutter. If there is no remote control, use the countdown mode to achieve the same effect.
9. Use high ISO
With high sensitivity, noise is bound to increase, so we don't use it much. However, in low light environment, the practical use of high sensitivity allows us to obtain sufficient shutter speed to reduce the image blurring caused by the shaking of the equipment or the main body. It can also be used as a way to improve the shutter speed to freeze the instant dynamic use. Today's devices can control noise in both software and hardware, and even if the noise is noticeable, the resulting image can still be sharp thanks to improved shutter speeds that reduce blur. In most cases, a picture with high noise and sharp image will be more successful than a picture with low noise but blurry image. So give it a try.
You also need to balance the noise and quality
A lot of cameras now work well with high ISO, so you can use the highest sensitivity you can get, but there is a balance between noise and quality, and too much noise is not a good thing.
Recent Posts
-
Affordable Large Canvas Prints: How to Find Cheap Canvas Prints Without Compromising on Quality
If you’ve ever thought about decorating your space with large canvas prints, you might have he …18th Feb 2025 -
Cheap Canvas Prints for Painting: Affordable Art Supplies for Every Artist
For artists, finding high-quality yet affordable materials is essential to fueling creativity withou …17th Feb 2025 -
Floating Frames for Canvas: Elevate Your Wall Art with Style
When it comes to displaying canvas art, the right frame can make all the difference. Floating frames …14th Feb 2025
